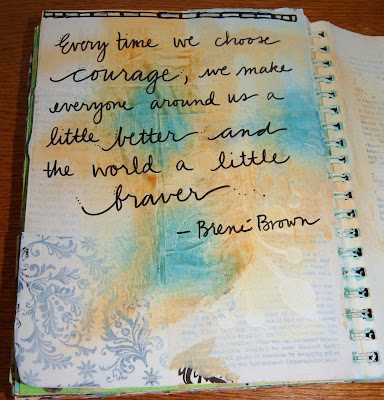
"Every time we choose courage, we make everyone around us a little better and the world a little braver." ~Brene Brown
My soul journal is filled with layers and layers of collage and mixed-media. I will sometimes journal and then gesso right over the words on the page and then create a whole other layer. I love texture and use text pages and dies and different media to create it -
and then sometimes I'll collage an inspiring magazine photo over it or maybe draw or stamp something that I think is beautiful and suits my mood...
but sometimes, I just want to write something simple, yet powerful and then leave some empty space so that the pages can answer back with a response. Whatever my heart needs at that moment.
And look!! Only a few pages left here and it's on to a brand new book!
CHOOSE COURAGE my friend. Be gentle and kind to yourself. You will make this world a better place for it.
Monday, September 16, 2013
Choose Courage...
Labels:
art journaling,
brene brown,
collage,
courage,
mixed-media,
quotes,
soul journaling
Monday, August 5, 2013
Come one, come all!! Marco's Carnival Party was a blast!
So, I am going to tell you right now that this is a VERY heavy photo post. Lots and lots of pictures, but I wanted to be able to share all the ideas I used for the party. My little guy has been wanting a carnival party for a long time. We don't have the biggest space as we only have a patio and not really a "back yard", but we made it work! Come along and see what we came up! We had a great time on a very MINIMAL budget! Really! You can do it too!
This was the invite I made. Super simple mini banner. I added a balloon punch to the envelope. Super cute.
If you like doing really nice goody bags, I advise you to shop in advance, looking for the best deals and try to think outside the box. Make your items work for your theme. The one item I was set on (my splurge item) was the large carnival swirl lollipops. I got them at Smart n Final for a little less than a dollar each. They were the perfect touch!
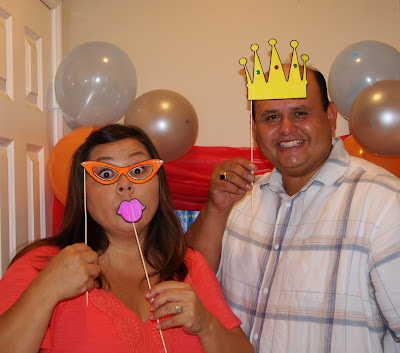
This is my amazing husband and I. I am so thankful for such a supportive guy. He helped out with everything and was very involved with it all - as usual. I just love him so much!
The birthday boy... a little excited, yes? haha
Here is in the "Photo Booth" with his sister Naomi.
I am no baker, but was determined to keep costs down by making the cake/cupcakes. I wanted to stay with our carnival theme so I chose funfetti cake mix for all of it. I was not interested in trying to make a cake from scratch. lol I also picked up some Duncan Hines Frosting Creations frosting. It comes plain and white and you can buy a separate little packet of colored flavoring. I chose blue cotton candy. It was amazing.
I also used Cream Cheese flavored frosting on the cupcakes and then after watching this youtube video on how to make marshmallows look like popcorn, put my awesome daughter Taryn to work on them. The trick to really making the marshmallows look like popcorn are to snip several of the marshmallows with scissors to make it look like a POPPED kernel. They were perfect!
These are chocolate dipped oreos that were meant to be dipped oreo lollipops. Well, I couldn't get the little sticks in the cookie filling without breaking them. Maybe Double Stuff would have worked. So I ended up just dipping them in the candy melts and sprinkles. There was not one left. =)
What's a carnival without popcorn and cotton candy??
Another great thing about carnivals are the games!! Here we have the Tin Can Crash. I used old vegetable cans and covered them with scrapbook paper I had at home. One ball from Marco's toybox and we had a game!
Here was one of the more popular games - Ring Toss. We bought some diving rings in the seasonal section at Big Lots. These are the rings you can use in the pool for diving after. We had the cones in the garage already. Great game for all ages.
This was the Duck Pond. I had fish bowls already from a previous event. We bought a bag of rubber duckies for $3 at a party store. The idea is to throw or bounce the ping pong ball into a bowl. This game was really challenging, but lots of fun!
I wanted to make pinwheels for everyone, but didn't have the pins that I usually use to make them spin. So they were more of a decoration. I made them and then glued them to Pixi Stix, plopped them into some artichoke jars that a friend had saved for me and added popcorn for filler. Boom. Centerpieces are done.
I realized that even though I make banners all the time in my shop, I have never really made one like this for any of my own children. What on earth? lol So I decided I would only use papers I had on hand. I also made some larger pin wheels for the banner. I used Cricut Storybook cartridge for the letters. I was really happy with how it turned out. You can order your banner made by me right HERE.
I also saved frappucino bottles for a while knowing I wanted to use them for something. I also had some nice bottles from my Prima Flowers. I removed the labels from all of them and ran them through the dishwasher on high temp. Then I covered each with a strip of scrapbook paper and added a paper straw (bought at Marshall's) and voila! We had adorable little bottles for the lemonade. The kids loved drinking out of these. Some of them asked to take them home and of course, I let them.
For food, I served grilled burgers, nachos, corn dogs and watermelon slices.
For food, I served grilled burgers, nachos, corn dogs and watermelon slices.
The whole family was involved in this party. Hannah my oldest daughter had a photo booth.
I don't have a Cricut cart that has any of the photo booth props, so I decided to search the internet. I found THIS site where she offers 12 pages of free printable props. She had three choices: black, color, or outlines. Since we were working on a budget, we decided to print out the outlines and then my girls got to work with some Crayola markers. We added a bit of bling and they were perfect. I hot glued them to some skewers and then placed them in clean pickle jars that I wrapped with scrapbook paper. Done and done.
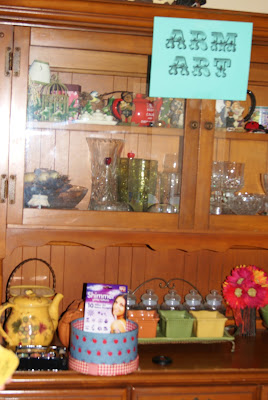
We wanted to do some kind of face painting booth, but I found this kit at Ross for less than $7. These were a hit with the kids AND adults. My daughter, Taryn ran this booth. We called it Arm Art.
Marco taking a refreshing lemonade break.
For the Spray Away game I used a styrofoam block, 6 golf tees, 6 ping pong balls (99cent store), and a water gun. The idea is to see who can shoot the most ping pong balls off the tees in 15 seconds. Lots of concentration and a steady hand needed for this game.
Here's Mia having fun at the Ring Toss.
We called this game Duck Race. We wanted to find something that was long and narrow for the water, but we couldn't find anything within our budget. So my awesome husband went out on the hunt and found this Seed Starter for about $4. We added two rubber duckies and some straws and the kids lined up to race their ducks. Really cute and easy for all to play.
I wasn't going to have a pinata for the party and my son looked at my like I was nuts. haha. No pinata? Inconceivable. So yeah. We got a really nice one for $14. Can't beat that with a stick! hahahohohehehe. Oh, that was a good one... *sigh*
Make a wish!
More photo booth fun!
He got so many nice presents! Lots of school clothes and a few fun toys to balance it all out.
And this is how the high ended. He still had ketchup on his face along with some cotton candy on his neck. Perfect, right?
You don't have to spend lots of money to have a great party. Just a little creativity and imagination...and pinterest and you are good to go! ;)
Labels:
Altered to Perfection,
birthday party,
carnival,
carnival games,
circus,
cotton candy,
cupcakes,
DIY,
family,
free printables,
paper straws,
photo booth,
photo booth props,
pinwheels,
popcorn theme
Wednesday, July 17, 2013
Sharpie Tie Dye T-shirts
Have you seen the cool Sharpie Tie Dye projects that have been all over pinterest?
Did you pin them, but never looked at them again?
Well, this is one you MUST try.
It was so easy and very inexpensive!
You will need:
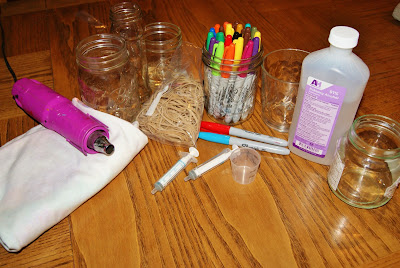
Sharpie markers (not the fabric kind - regular permanent Sharpie markers)
Rubber bands
Rubbing Alcohol - 91% is what I used
Different sized glasses/jars or plastic cups
Eye dropper (we used regular medicine droppers)
Heat tool/hair dryer/iron to heat set the designs
White T-shirt: You can find t-shirts at the dollar store and dollar tree
I happen to get mine on clearance at Kmart
You begin by placing a rubber band around a jar or glass that you've inserted between the layers of the shirt. One of the girls had a Minnie Mouse head design in mind when she started, but the others were very random with their design.Those that know me know that I struggled a wee bit with them doing anything that didn't seem "orderly" haha!
"Wait!! Why or you drawing THAT there?" I'd say in a little bit of a high pitched voice. And this is the look I would get from Naomi. haha. Classic. "Chill out Mom." That must be what she's thinking.
So, I just let them make any designs they wanted. Dots worked best, but squiggly lines and even pictures were good too!
Taryn helped her brother Marco and they decided to tie the sleeves up with the rubber bands "old school" style. Then he just colored each section.
Once you've drawn your design, you fill up your dropper with alcohol and "trace" your design with the alcohol. The more you add, the more it gets diluted and the larger your shape will get.
Then you want to heat dry your design with a blow dryer on high heat (be careful with this step! You can get burned!)
When it feels dry, remove the rubber bands and then do another design.
Teamwork!!
I ran a hot iron over each of the shirts when they were done, just for good measure. We were very happy with the results. Easy peezy - lemon squeezy!!
We wrote a name after we heat set the design and then heat set it again (without adding more alcohol)
Here's the sleeve where he tied the rubber bands old school style. Oh and see the circular squiggly design there? That was one that I panicked a little bit about but it turned out great!!
I also saw on Pinterest that you could do this with hats, white canvas tennis shoes, aprons, etc.
Have fun!
Labels:
DIY,
easy projects,
kids projects,
Pinterest,
Sharpie Markers,
summer,
tie dye
Tuesday, June 18, 2013
Let's Hit the Beach!
My Hannah loves the beach and always has... I decided to do a beach theme for her graduation party.
I saw the marshmallow pop idea somewhere on Pinterest and put my good friend Desiree to work on them. hehe. That kept her busy for a while. I made the centerpiece with a large glass platter, some sand and rocks and then some random shells that I've collected through the years.
I used the mason jars that Mandy gave me from her wedding. I added the blue/gray burlap and hot glued a shell to it. They held a small tea light candle and gave off a pretty nice glow.
I put out fish bowls with gold fish crackers in some and shark gummies in the others. Big hit.
The larger jars were even easier. I took some shells, added a dab of hot glue to the inside and then stuck some twine in the ends. I found some beach sand and sea glass pellets at Big Lots on clearance. Perfect!
This was the drink station. I added some fishing nets, more shells and jars and a chalkboard with a quote that I doodled. Chalk markers work best on these re-painted projects.
Our friend Rick has a friend that just started her own cookie business called Sweet Treats by Shamaine and he ordered these for Hannah's party. Not only were these surfboard cookies perfectly decorated, but they were good too. Nothing worse than biting into a beautiful treat to find that the rest of it tastes horrible.
Now I've used some of the decor for my front entry way table "mantle". =)
Perfect for summer!
I love a good themed party! What will the next one be?? We shall see!
Labels:
beach,
cookies,
DIY,
graduation,
party,
summer,
themed parties
Subscribe to:
Posts (Atom)


